|
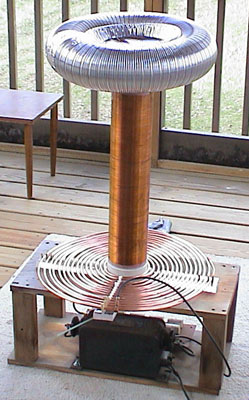
Overall picture of tesla coil after
updating with copper tubing and new toriod. |
") |
") |
| To wind the 1400 turns on the secondary 4" PVC form, I borrowed my wife's
quilt holder! Made a great support! I used two 4" PVC end caps with a bolt in each
end. |
The long process of winding the coil has begun. Every inch or so I taped the
wire so if the wire slipped out of my hand (which happen a few times), I wouldn't have to
start all over again. The secret to winding the wire is to keep the wire taught and feed
it at an angle, not straight across from the supply spool. |
") |
") |
| Bought a cheap piece of wood at Home Depot and made a quick base for the coil. |
I made the spark gap out of two 5/16" carriage bolts, right angle
brackets and 2 insulators. |
") |
") |
| The capacitor bank was assembled on pref board. Twelve 0.15uf, 2000v poly caps
were used to produce a MMC of 0.0125uf at 24,000 volts. |
There is a 10 megohm bleeder resistor across each cap. |
") |
 |
| The old primary coil was made of about 14.5 turns of #14 high voltage wire
temporally taped to a piece of cardboard. |
The new copper tubing primary. Consist of about 15 turns with the tune point
of about 13.5 being the best, The primary and secondary coils rest on the top section and
the power transformer, spark gap, etc are below, shielded from the high voltage secondary.
The transformer is 12,000v at 30 ma. |
") |
")
|
| View of the underside showing component layout and wiring. High voltage 15,000
volt wire used everywhere. A copy of the circuit can be found here. |
The secondary coil with 1450 turns of #28 magnet wire covered with varnish on
a 4" PVC pipe. |
|
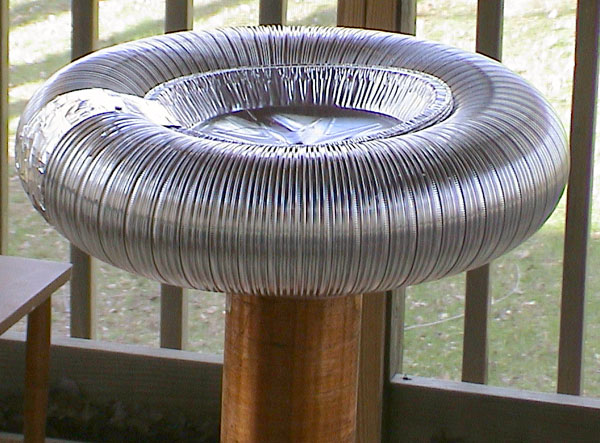
| New toriod. almost done. Need to fix taped section (left hand
side) as the sharp edges are causing multiple spark discharges there. The toriod. is made
from 8' length of 4" diameter aluminum dryer duct and pie plates for the center.
Would you believe I could not find real aluminum pie plates in any store I went to around
here? So I had to use these cheap aluminum foil plates. |
")
|
